A few months back, I wrote a quick quip about growing celery from the store-bought vegetable. Now I’d like to share a more in-depth guide to the process. It’s not difficult at all, and for less than five bucks at your local grocer you get a week’s worth of celery and a new houseplant!
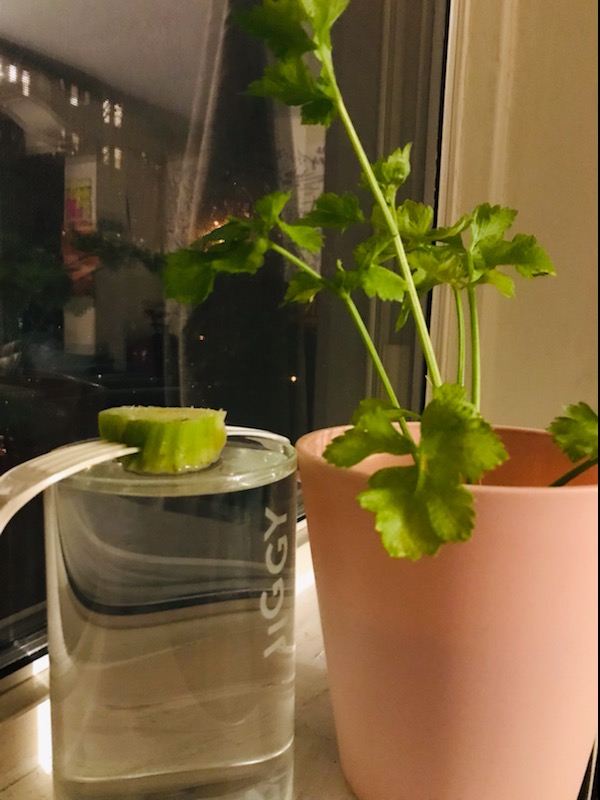
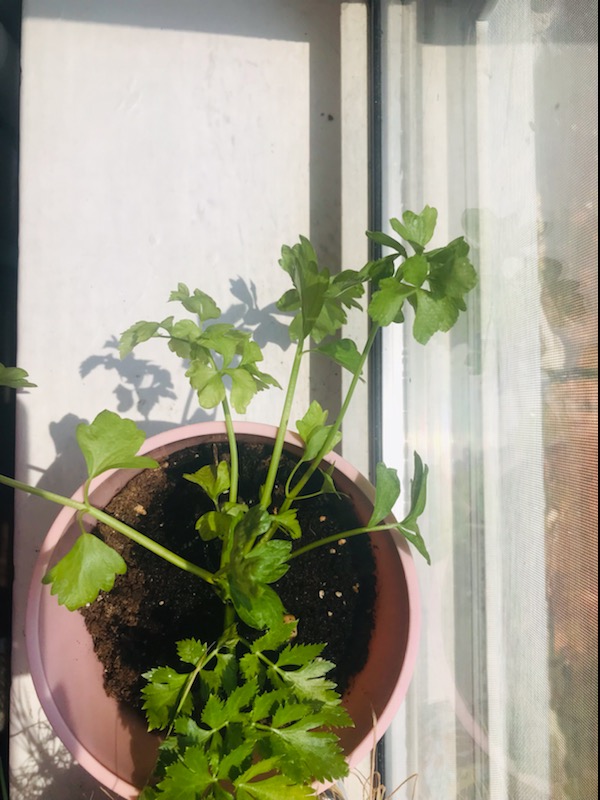
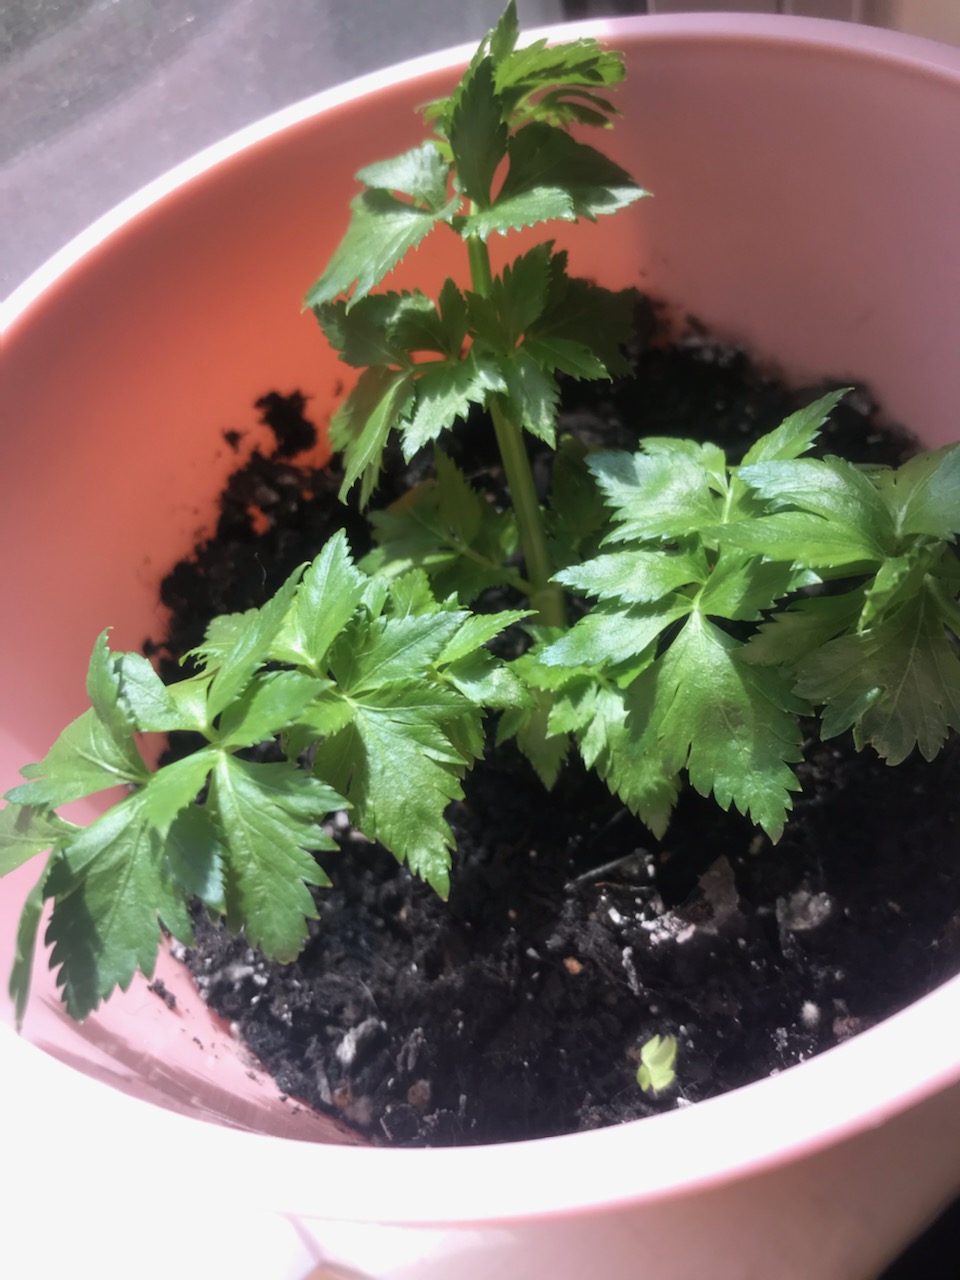
Check out how well my original celery plant’s doing:
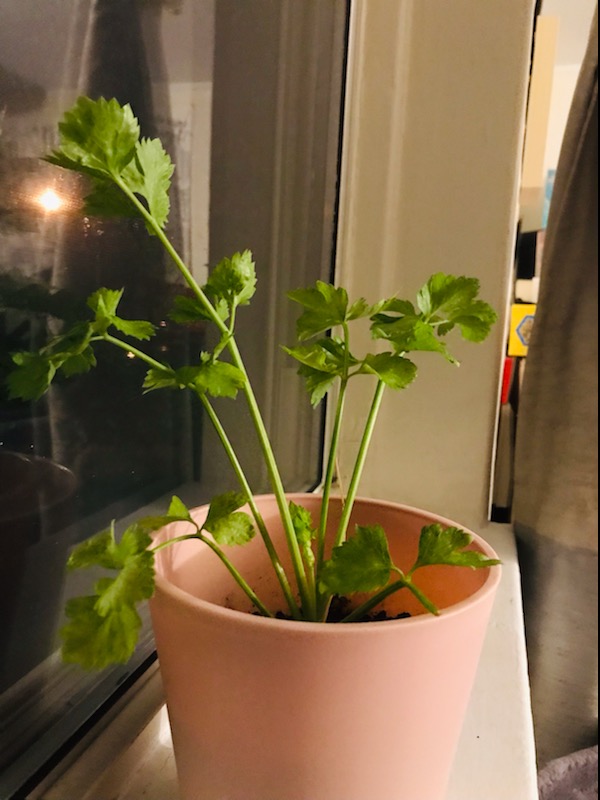
She’s got a new stem shooting up; that’s new growth as recently as this week!
So, here’s how to grow celery.
What You’ll Need
- Store-bought celery, but NOT individual stalks (you need the ‘root matter’ at the bottom to propagate)
- Cutting board
- Knife
- Plant pot/something watertight to grow your celery in
- Water
- Chop sticks or plastic forks
Step 1: Get the right part of the celery to propagate
Celery’s not a succulent. Therefore you can’t propagate one of these from leaves! You need the root end; that’s the last few inches at the thicker end where the stalks bunch together. Cut this part off, a few inches above the base.
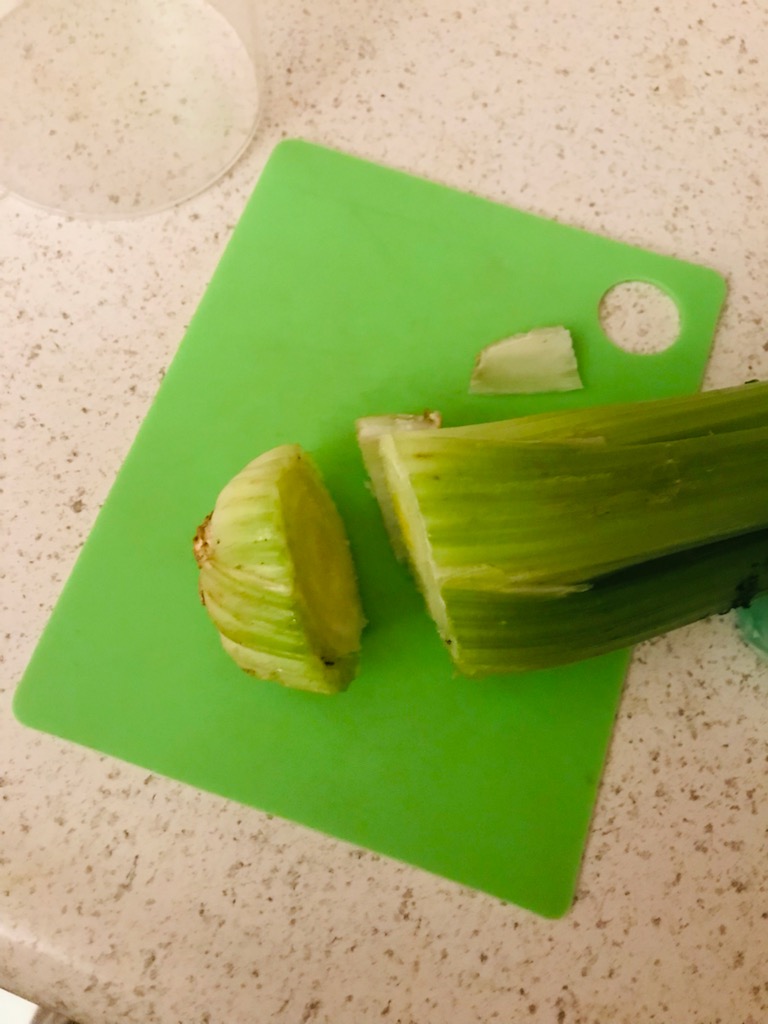
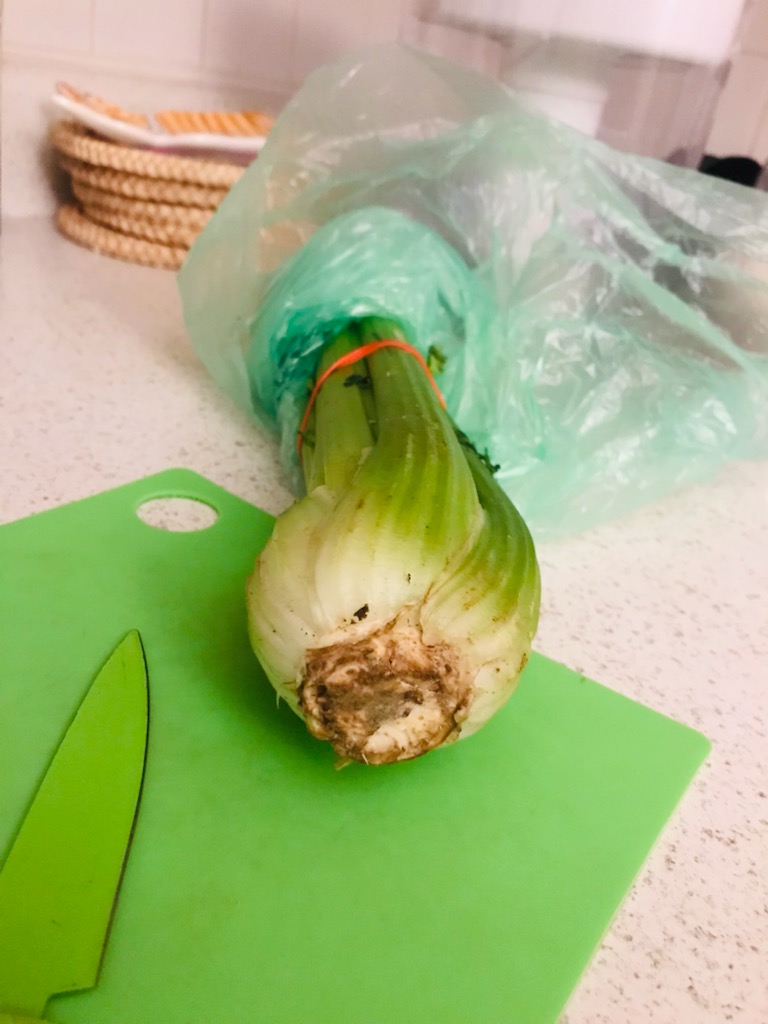
Both times I’ve done this, I’ve cut a bulb of about 1-2 inches.
Step 2: Prepare the pot
Next, get out the vessel that’ll hold your young celery as it comes to life. Here I’m repurposing the jar from a Jiggy puzzle! It was relatively clean, so I just gave it a quick rinse-out and then added water (I use filtered because, frankly, my city’s tap water is nasty) up as close to the brim as I could while still being able to move the jar to its ultimate resting spot.

Step 3: Stab your celery
Seems weird, but I’m not kidding. We need the root matter of the celery to sit at the top of the water. We don’t want the entire bulb submurged, and we don’t want the bulb levitating bone-dry. One way to properly position your celery bulb is to [gently!] skewer it in an “X” with chopsticks; I’m usually out of chopsticks, so I use plastic forks turned upside-down as shown here.
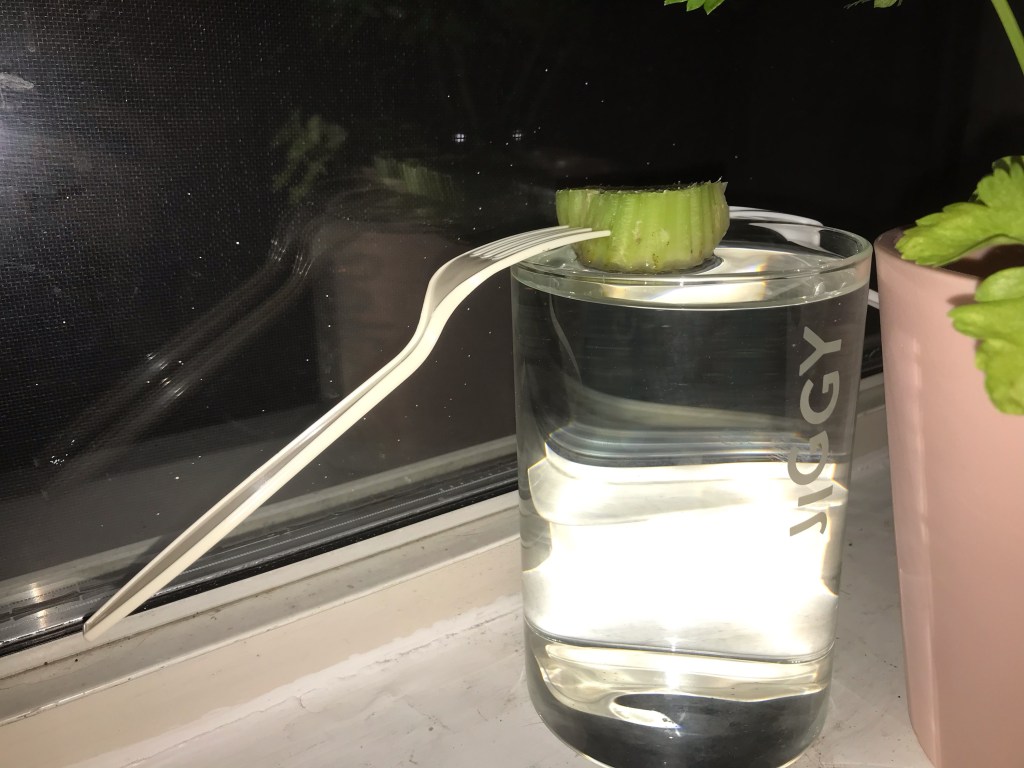
What really matters is that you’re gentle with the plant matter when you do this and that whatever you use, the bulb sits well.
Step 4: Find a place for your new plant
My original celery plant continues to thrive in bright, direct sunlight in a southern-facing window. It also does well with weekly watering (so far, even into December and the cold) even if the soil is still damp – which makes sense, considering the water content of celery. Turning your celery plant regularly, once well established, is also a great idea. You’ll be able to watch as the leaves turn to face the sun!
Prior to the winter, I was also giving her weekly organic fertilizer and neem oil treatments.
Caring for your Baby Celery, From Water-bed to Soil-bed
So we’ve gone through how to get your celery ready to grow big and strong at the very beginning. What do you do from here?
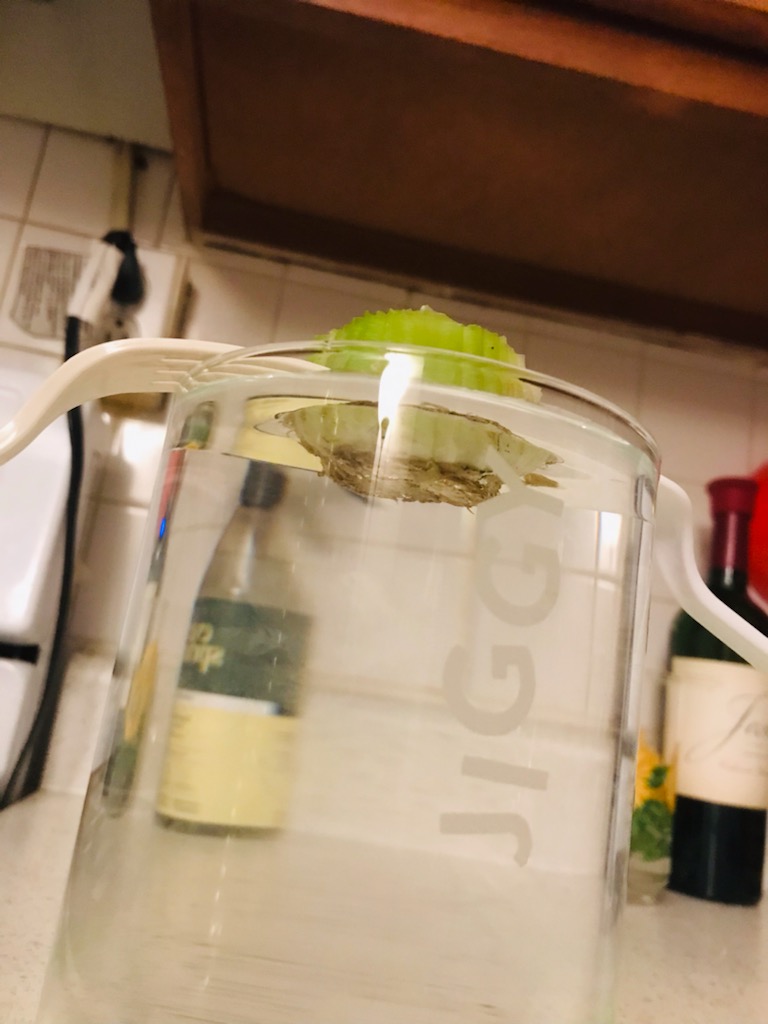
First, it’s important to regularly check up on your plantlet and add to/replace the water the bulb sits in. You’ll want to keep an eye on any stalks and shoots rising from the top center of the bulb – it can take weeks for this to happen, so don’t despair! You’ll also notice changes on the underside of the bulb, like bubbles forming.
You want to put the plantlet in soil before you end up with rot. Once you have visible, protruding roots, or as there’s visible growth but you’re starting to see brown around the top of the bulb – these are good times to plant the bulb in soil.
And, as mentioned above, these dudes like bright direct sunlight, moist soil, and (as appropriate for the season) fertilizer.
Celery is a fantastic plant to add to your indoor collection. It’s easy to care for, aesthetically pleasing, can provide food, and safe for cats! And you’ll have quite the sense of accomplishment – gardening-ly and financially – propagating it from a piece of produce.
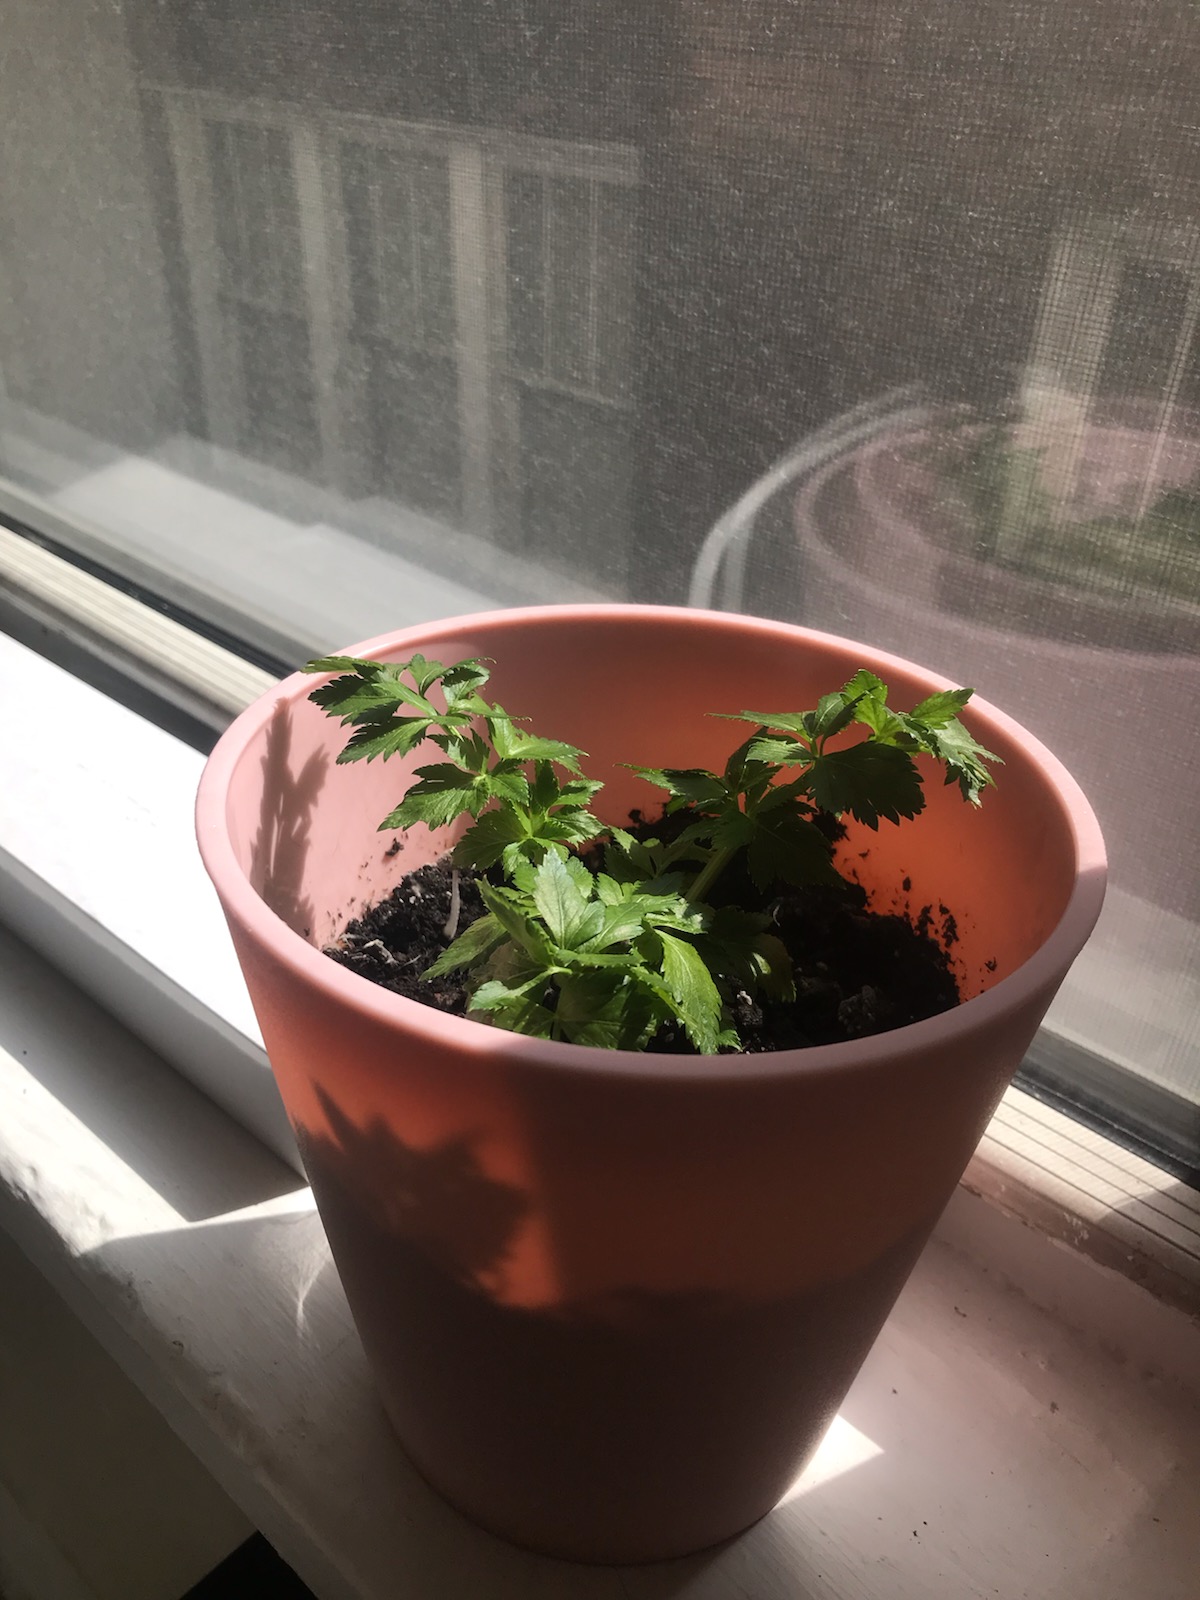
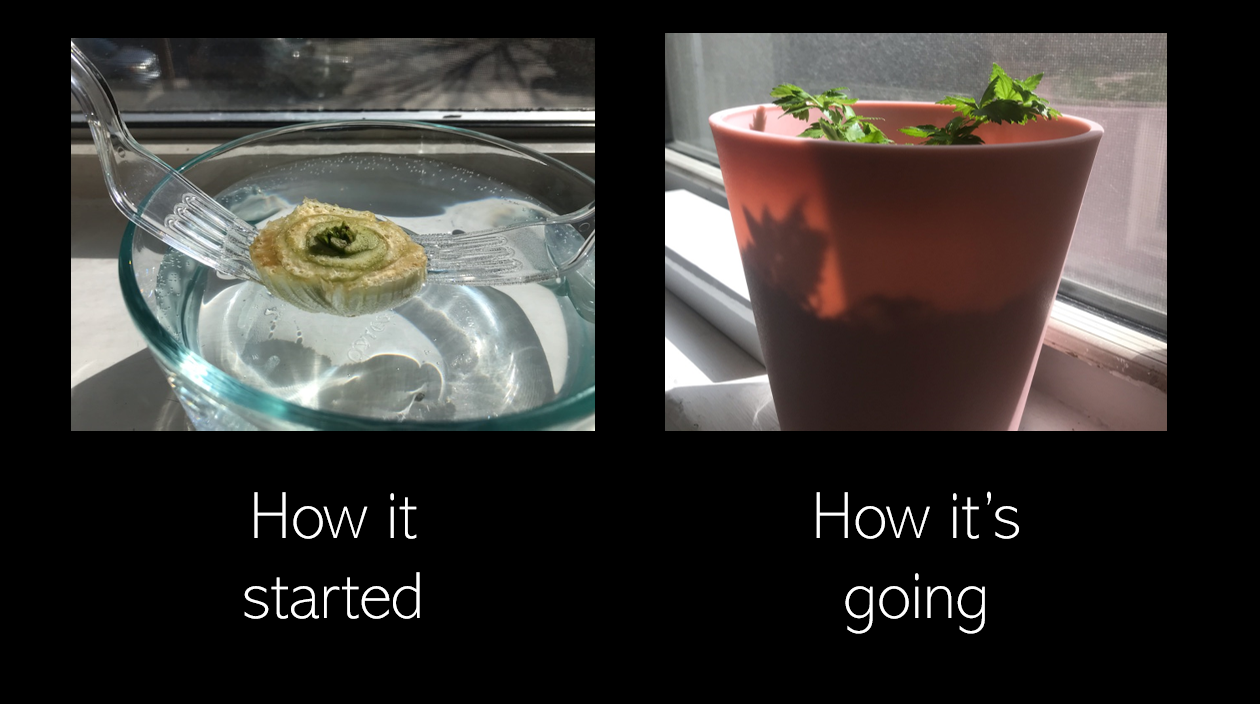


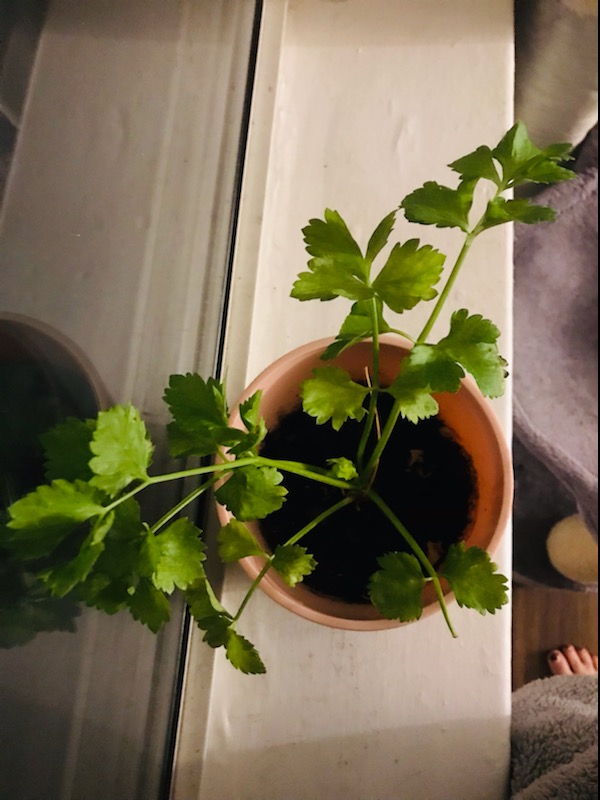
Take a look at the images – remember that “how it started/how it’s going” from months back? Look how tall that same plant is now, next to my brand new celery bulb! This brings me joy.
✿
