When I need a quick tutorial, I don’t want to parse through a video or read a diatribe on why someone loves a product before I learn to do what I want to do. So I’m launching this series of simple, straightforward, specific instructions on how to do different things in Adobe Illustrator and related software. I hope you get something you need or want out of it!
For this tutorial, you can get the plant I use in the examples here.
The Pre-steps: Placing an Image in Adobe Illustrator
Go to File > Place, and choose an image. You can then place it in the artboard simply by clicking.
The Main Tutorial: Making a Picture into a Live Paint Object to Color
Step 1: Trace the image. Make sure the image is selected, then go to Object > Image Trace > Make

Step 2: Expand. With the image still selected, go to Object > Expand. Leave the settings as they are, and click OK.

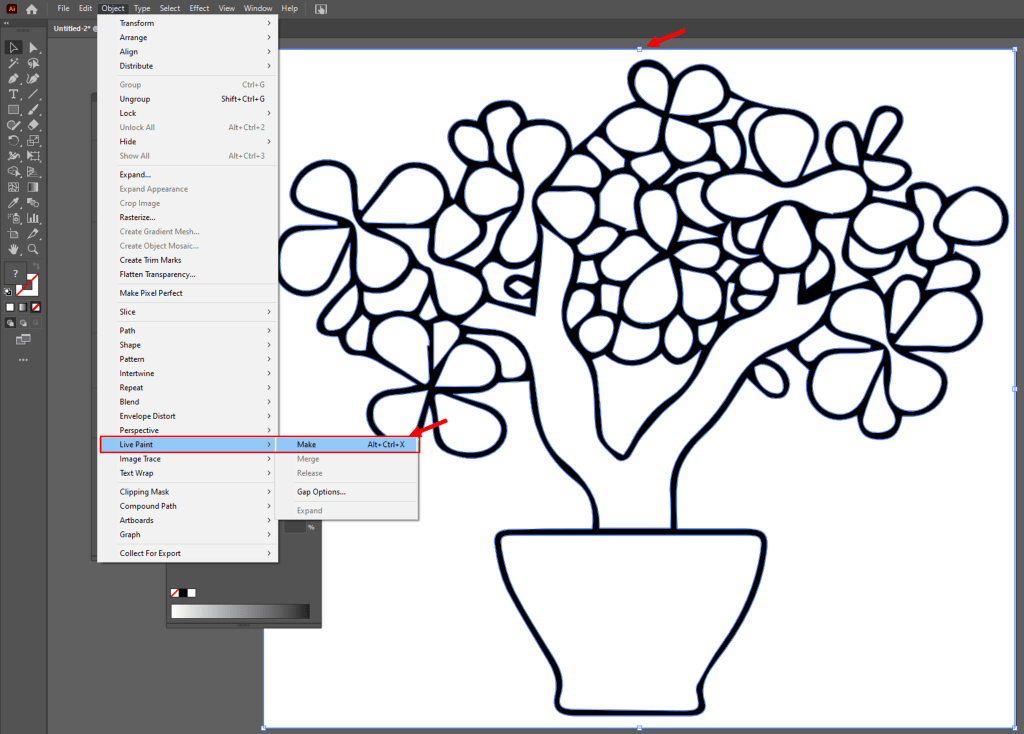
Step 3: Create Live Paint Object. Making sure the image is still selected, go to Object > Live Paint > Make.
Step 3: Paint! Deselect the image. Then hit K on your keyboard (alternatively, find the Live Paint Tool in the toolbar underneath the Shape Builder Tool); the mouse will change to a paint bucket and three squares. This is the Live Paint tool, which you can use to bucket paint areas in the image.

Areas where paint will be poured get outlined in red; click to fill with the chosen fill color.

You can paint in an entire image this way! I made these, for example:


Want to color in these cute lil plants like I did? I got the original image from HERE. Enjoy!
